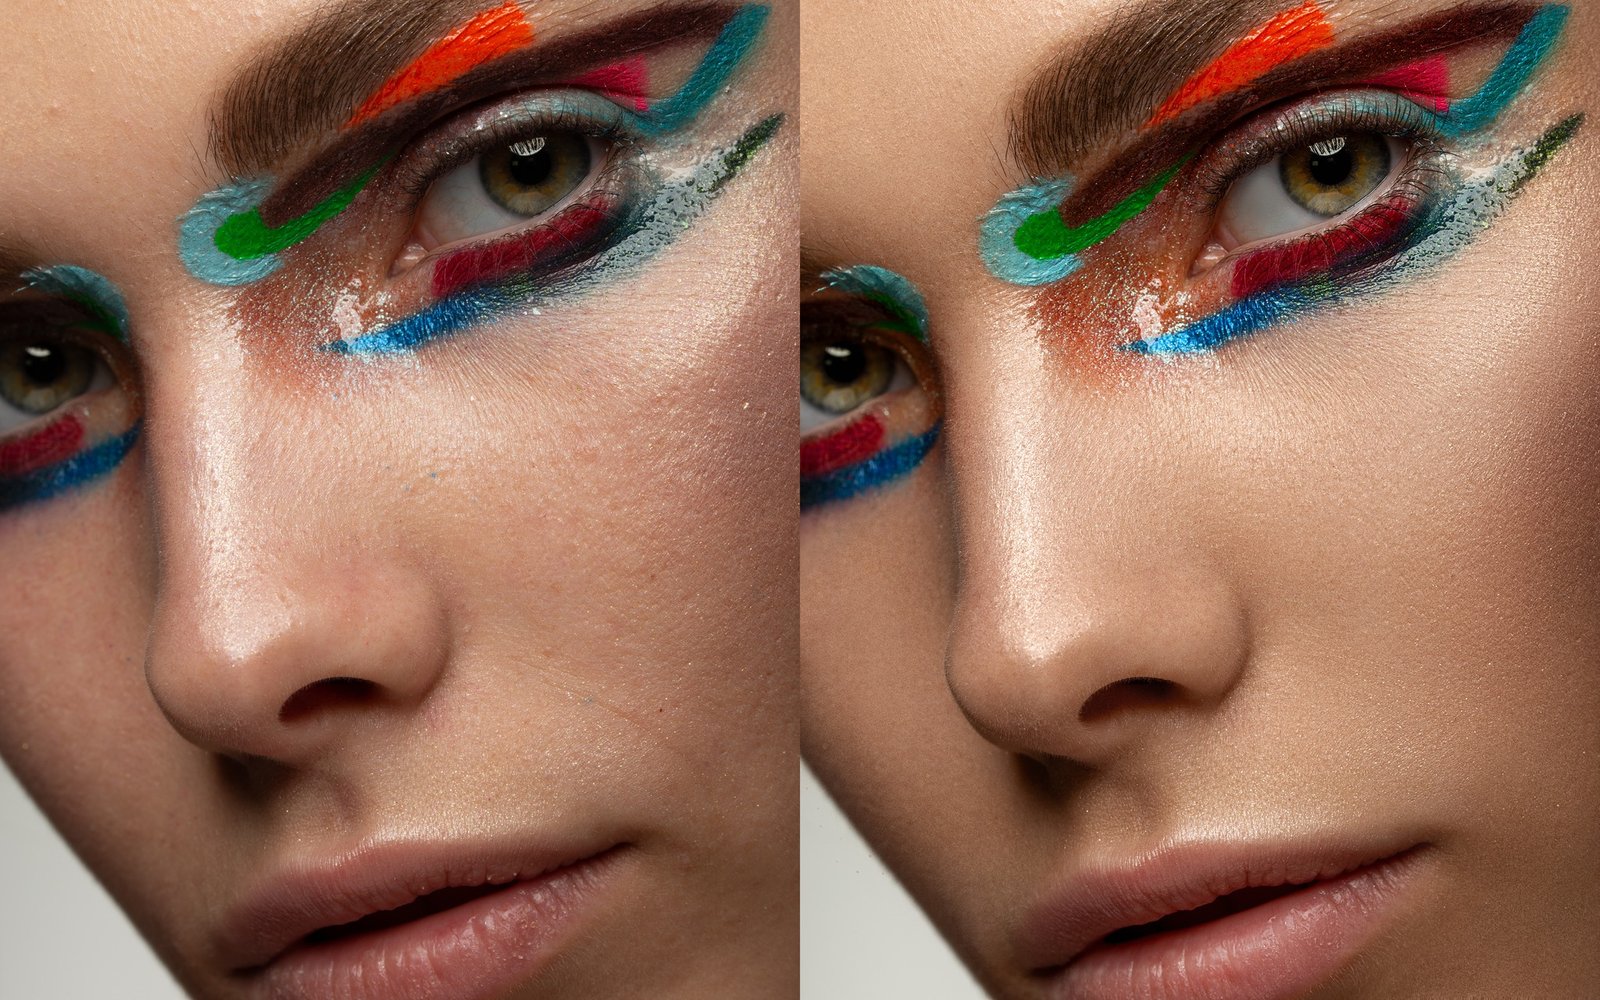
In professional photography and image editing, knowing how to professionally retouch skin in Photoshop is a crucial skill that can transform an ordinary portrait into a stunning masterpiece. Whether you are a retoucher, photographer, or enthusiast, mastering this skill will help you deliver polished and realistic images without making the subject look artificial or over-edited. In this comprehensive guide, we will cover everything from image preparation to final export, showing you step-by-step how to professionally retouch skin in Photoshop for perfect results.
Why Skin Retouching Matters
Before you dive into how to professionally retouch skin in Photoshop, it’s important to understand the purpose behind it. Skin retouching is not about erasing all imperfections or creating an unnatural look. Instead, it enhances the natural beauty by removing temporary blemishes, evening out skin tone, softening harsh lighting effects, and emphasizing the subject’s features. Proper retouching preserves texture and character, which keeps the image authentic and relatable.
Step 1: Start with a High-Quality Image
The first step in how to professionally retouch skin in Photoshop is ensuring that you work on a high-quality image. Retouching a low-resolution or compressed photo limits your ability to make clean, detailed edits. For the best results, use images that are sharp, well-lit, and minimally compressed. Raw files or high-resolution JPEGs are ideal as they provide more detail to work with and make skin retouching in Photoshop easier and more precise.
Step 2: Create a Non-Destructive Workflow
One of the most important practices in how to professionally retouch skin in Photoshop is to keep your edits non-destructive. This allows you to make adjustments later without damaging the original image. To set up:
- Duplicate your background layer by pressing Cmd/Ctrl + J.
- Rename this new layer “Retouch Layer”.
- Always perform your edits (healing, dodging and burning, frequency separation) on separate layers.
- Convert important layers to Smart Objects when applying filters so they can be modified later.
This setup protects your original image and gives you flexibility throughout the retouching process.
Step 3: Remove Blemishes Using the Healing Brush Tool
A key part of how to professionally retouch skin in Photoshop involves cleaning up small skin imperfections without losing texture. The Healing Brush Tool is perfect for this:
- Select the Healing Brush Tool (shortcut J).
- Use a soft round brush and adjust its size to slightly larger than the blemish.
- Sample a clean skin area by holding Alt (Option) and clicking.
- Paint gently over blemishes, scars, or temporary acne to blend them seamlessly.
This method retains skin texture while removing distractions.
Step 4: Even Skin Tone with Frequency Separation
Frequency Separation in Photoshop is a powerful technique in how to professionally retouch skin. It separates texture from color, letting you smooth uneven skin tones without losing detail.
Here’s how:
- Duplicate your retouch layer twice.
- Rename one “Low Frequency” (for color and tone) and the other “High Frequency” (for texture).
- Apply Gaussian Blur on the Low Frequency layer until the skin tone smooths but isn’t blurry.
- On the High Frequency layer, use Image > Apply Image to subtract the Low Frequency layer.
- Set the High Frequency layer’s blending mode to Linear Light.
- Group these layers and name the group “Frequency Separation”.
Now you can smooth color inconsistencies on the Low Frequency layer with a soft brush without damaging the natural texture held in the High Frequency layer.
Step 5: Sculpt with Dodge & Burn
Dodging and burning is essential in how to professionally retouch skin in Photoshop to add depth and dimension by controlling highlights and shadows.
Steps:
- Create two curves adjustment layers: one for dodging (lightening) and one for burning (darkening).
- Fill their masks with black to hide the effect.
- Use a soft white brush at low opacity (2–5%) to paint highlights and shadows where needed.
- Lightly brighten areas like cheekbones and brow bones.
- Darken contours such as under the cheekbones and jawline.
This subtle enhancement sculpts the face naturally, making features pop.
Step 6: Correct Redness and Blotchiness
Red areas like acne, rosacea, or flushed cheeks can be toned down during your Photoshop skin retouching workflow:
- Add a Hue/Saturation adjustment layer.
- Target reds and yellows and reduce saturation slightly.
- Mask the effect to only apply on the red areas (use a soft black brush to hide unwanted areas).
- You can also use Selective Color or Color Balance layers to fine-tune skin tones.
This keeps the skin tone balanced and uniform.
Step 7: Enhance Eyes, Lips, and Brows
In how to professionally retouch skin in Photoshop, the eyes, lips, and brows bring life to a portrait:
- Zoom in closely.
- Sharpen the iris and add catchlights to make eyes sparkle.
- Lighten the whites of the eyes, but avoid making them unnaturally bright.
- Define eyebrows softly with a low-opacity brush.
- Clean the edges of the lips and enhance their natural color subtly using Hue/Saturation or Dodge & Burn.
These details elevate the image’s overall impact.
Step 8: Final Touches and Color Grading
Once the skin is retouched, finalize the image by adjusting its overall tone:
- Use Selective Color for fine tuning.
- Apply Color Lookup Tables (LUTs) for stylized color grading.
- Add a gentle vignette to focus attention on the face.
- Sharpen the final image with High Pass or Unsharp Mask techniques.
Check Adobe’s official guide on export settings for detailed export tips.
Step 9: Export for Web or Print
Proper export ensures your professionally retouched skin looks great across platforms:
- For web: File > Export > Save for Web. JPEG, sRGB, 72 dpi, quality ~80%.
- For print: Save as TIFF or high-quality JPEG with AdobeRGB or CMYK, 300 dpi resolution.
Common Mistakes to Avoid
- Over-smoothing: Skin should have visible texture.
- Excess saturation: Avoid unnatural colors.
- Blurring edges: Use masks precisely.
- Ignoring eyes and lips: They bring the image to life.
Conclusion
Mastering how to professionally retouch skin in Photoshop is about enhancing natural beauty while preserving authenticity. With tools like frequency separation, dodge & burn, and the healing brush, you can create stunning portraits with realistic skin. Keep practicing, stay subtle, and let your Photoshop skills speak through your work.